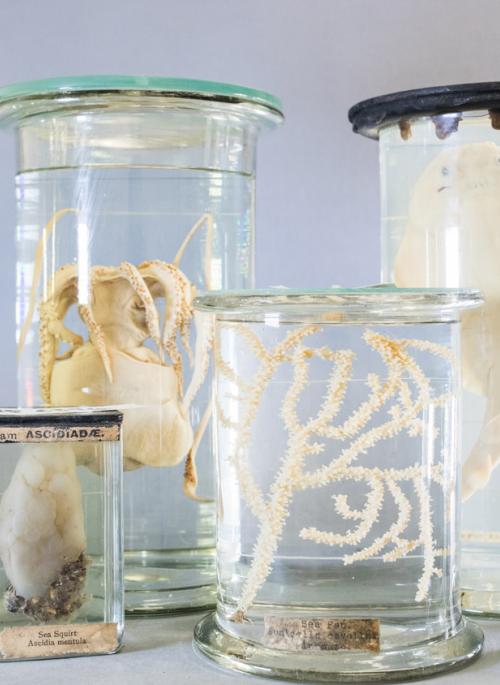
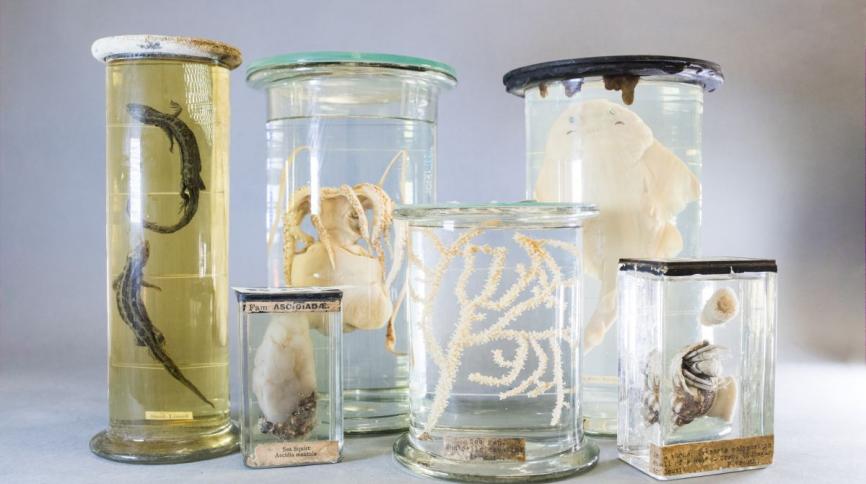
Did you know? St Albans Museums' collection includes 200 specimens (little animals, plants, pieces of minerals...) in jars, preserved for decades, which were rediscovered and restored by the Museums' Conservator and volunteers. You can learn more on our Pickling Project Archive Page.
These activities allow you to experiment with jars: imagine specimens of your own or grow a plant. You can use any empty jar for these activities, just make sure that they are clean and dry beforehand.
Happy crafting!
Make your own Specimen in a Jar!
This activity will show you how to make your own paper plant specimen in a jar and use it to decorate your bedroom. You can make many of them to start you own collection!
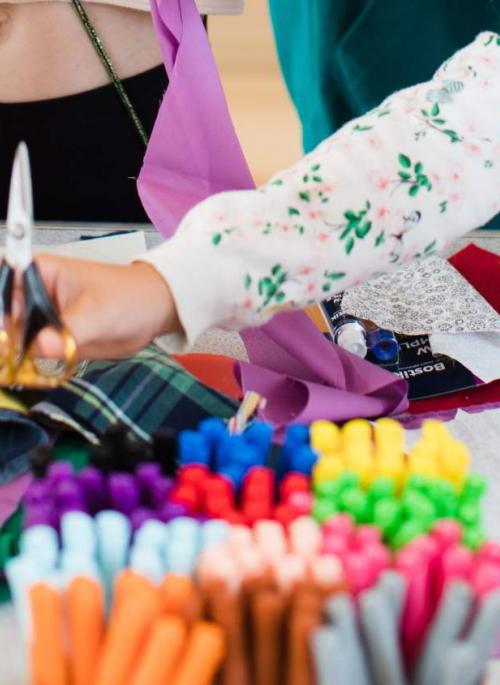
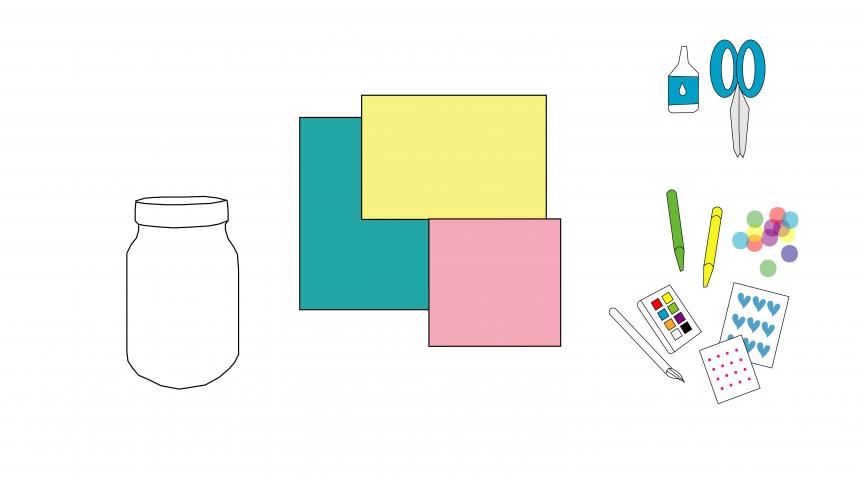
For this activity, you will need:
- 1 jar, clean and dry, with its lid
- Coloured paper, preferably rigid paper. You can use all the scraps and bits of colourful paper you find!
- 1 bottle or tube of liquid glue
- 1 pair of scissors
- Supplies to decorate your specimen such as colour markers, stickers, paint, glitter, chenille stems, buttons...
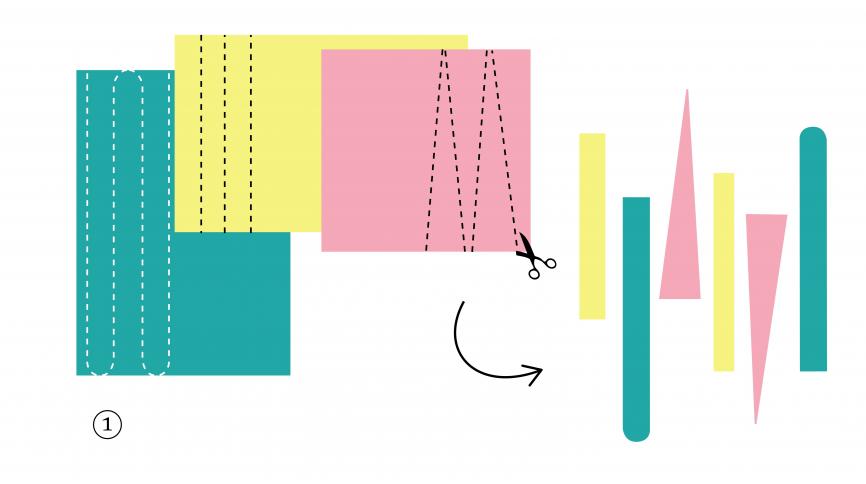
1. With the help of your pair of scissors, cut some strips of paper (no longer than the height of your jar). You can cut wavy strips, triangles, round out the edges, and use smaller and longer strips.
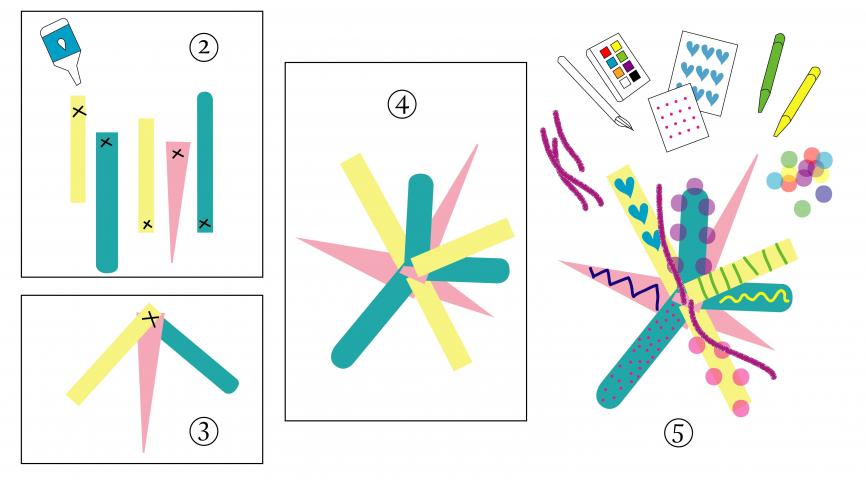
2. Next, assemble your specimen by adding a dot of glue at the base of each strip.
3. Add one strip onto another using the glue, making sure you arrange them in a star shape and that they join at the centre.
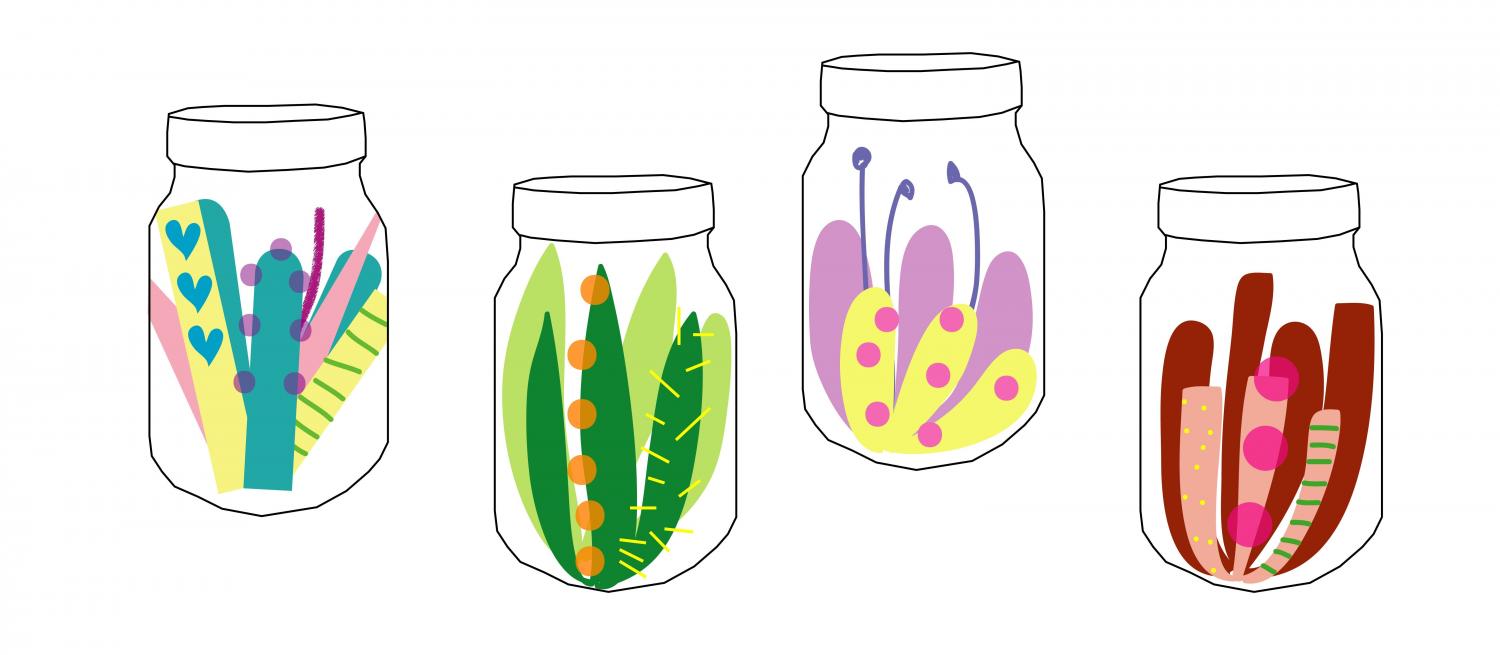
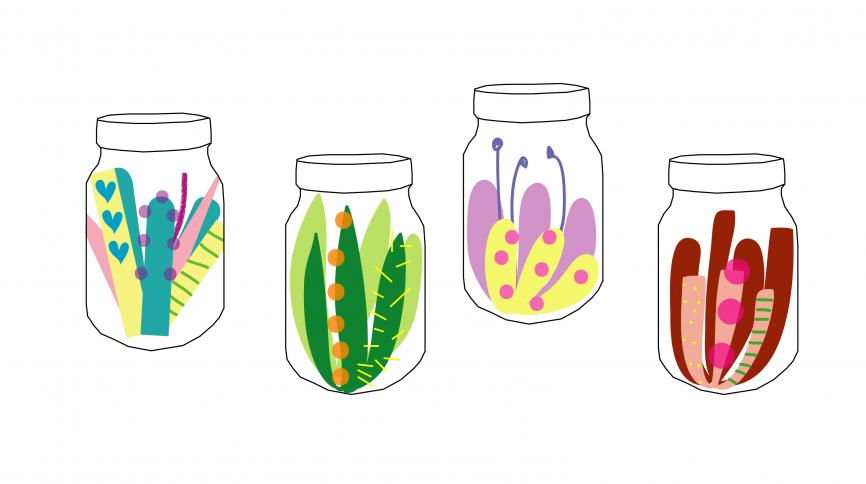
4. Once you are done assembling, this is what your paper specimen should look like.
5. Now decorate your specimen: draw some colourful stripes and polka dots, add some stickers, a little glitter, small pompoms, more patterns and shapes... The more colourful the better!
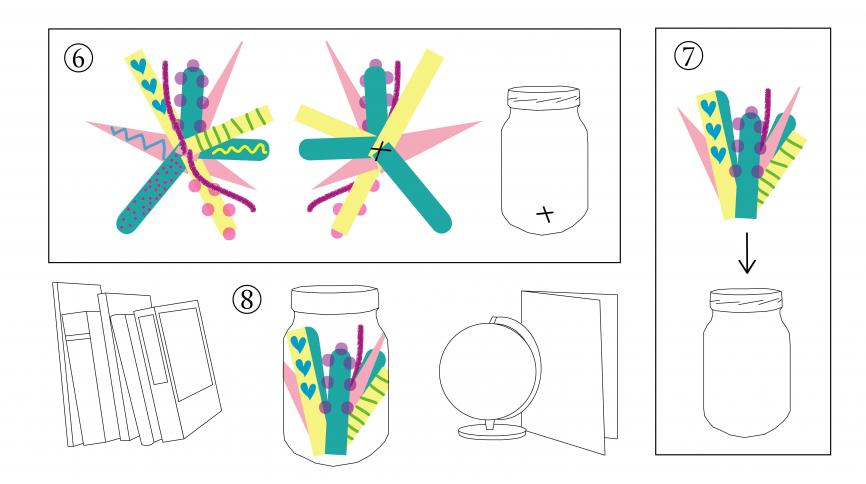
6. To put your specimen in the jar, turn your specimen around and fold each strip towards the centre, making sure the decorated side is on the outside.
7. Once they are all folded, you can insert your specimen into the jar, bottom first.
8. Close your jar shut with its lid.
Your specimen in a jar is ready to decorate the house!
Now you can create as many specimens as you like, in jars of all sizes, and start your own collection!
Grow your own Plant in a Jar!
This tutorial will demonstrate how to grow your own indoor plant- All you need is a jar and an onion!
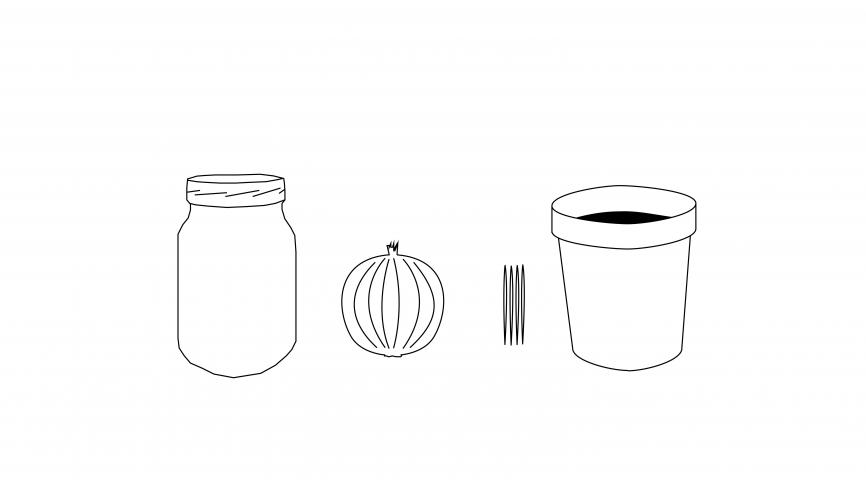
For this tutorial, you will need:
- 1 jar, clean and dry, no lid necessary
- 1 big onion, peeled
- 4 toothpicks
- 1 pot with potting soil OR a soil patch outside
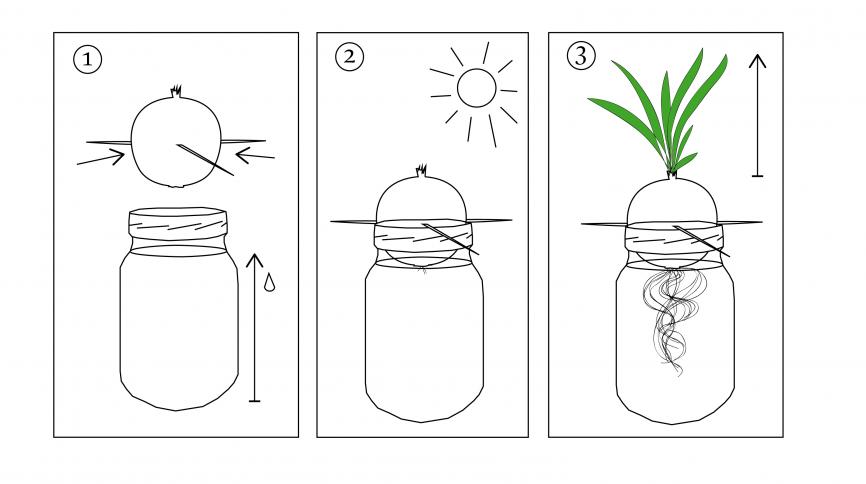
1. Insert one-third of each toothpick into the sides of your peeled onion to suspend it on the top of the jar and hold the onion out of the water.
Remove the onion, fill up your jar with water, and replace the onion over the jar, making sure that the bottom of the onion touches the water. It's where the roots of your plants will grow!
2. Make sure that your jar receives full sunlight through a window for minimum six hours daily.
3. Within a few days, new roots will appear in the water. Change the water daily or every other day to ensure it stays fresh and clean. The upper side of the onion now grows long green stems!
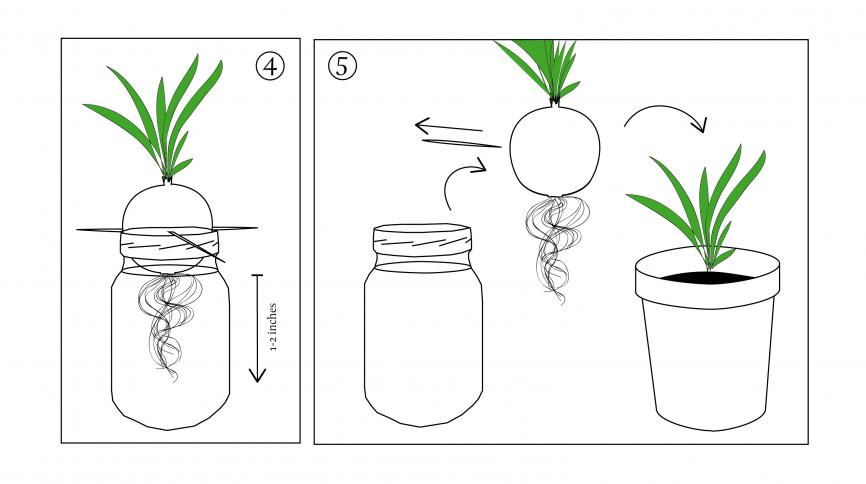
4. Wait a few days until the roots reach 1-2 inches in length (between 2.5 and 5 cm).
5. When the roots are long enough, transfer the onion bulb to a pot with humid potting soil or in your favorite soil patch outside. Only the plant should be visible.
You have grown a real plant in a jar!
Draw your Own Specimen in a Jar!
Now you can draw your own specimen in a jar- it can be scary, beautiful, fantastical, or inspired by nature! Simply download and print the Jar Drawing Sheet below.